

You open a gear tab, then another, then another. One site says you need boots. Another says trail runners. A third makes it sound like your first day hike requires the budget and packing list of a small expedition.
That confusion is normal.
Most beginners don’t struggle because hiking is too complicated. They struggle because the gear world often treats every purchase like a final exam. It isn’t. Good hiking gear for beginners is really about making a few smart decisions in the right order.
The process is similar to setting up your first kitchen. You don’t need every gadget on day one. You need the tools that keep you safe, let you do the basics well, and leave room to learn what you use. Hiking works the same way.
I’ve seen plenty of new hikers start with borrowed packs, simple layers, and a map screenshot tucked into a side pocket. They had a great day because they matched their gear to the trip. I’ve also seen people buy expensive equipment too fast, then realize they hated how it fit, weighed, or worked.
Your body matters too. If you're building strength for steeper trails, a personalized strength training app can help support the kind of leg and core endurance that makes carrying a pack feel much easier.
Your Adventure Begins Here
The first thing to know is simple. You do not need the fanciest setup to start hiking safely.
What you need is a decision filter. Every piece of gear should answer one of these questions:
- Does it keep me safe
- Does it keep me comfortable
- Does it suit the trail I’m doing
- Will I still want to carry it after an hour
That filter saves beginners from two common traps. One is underpacking because a short trail feels casual. The other is overpacking because every “must-have” list online piles on another item.

A better approach is to build your kit in layers. Start with what gets you out for a short, local day hike. Add pieces as your hikes get longer, colder, wetter, or more remote.
Trail mindset: Buy gear for the next few hikes, not for a dream trip you might take someday.
That’s also why I like pointing beginners toward practical packing ideas instead of endless shopping lists. If you want a simple companion read, this guide to camping must haves and essentials shows how to think about useful gear without turning your bag into a junk drawer.
The outdoors is full of people who started small. A local loop. A borrowed bottle. A fleece from the closet. The point isn’t to look like an expert. The point is to be prepared enough that your first hike feels fun, not frantic.
The Core Four Your First Hike Must-Haves
If the full gear universe feels overwhelming, shrink it.
For your first real day hike, focus on four critical items. Footwear. Layers. Navigation. Hydration. Get these right, and the rest of your gear choices become much easier.
There’s a bigger safety framework behind this. The Ten Essentials system, established by The Mountaineers in 1930 and updated in 2000 to its modern 10-category form, is widely recommended for hikers. It includes navigation, sun protection, insulation, illumination, first aid, fire-starting tools, repair items, nutrition, hydration, and emergency shelter, as outlined in REI’s beginner hiking guidance at REI’s hiking for beginners article.
Footwear comes first
Your shoes are your tires. If they don’t match the terrain, the rest of the vehicle doesn’t matter much.
For smooth, dry, well-marked trails, many beginners do fine in sturdy hiking shoes or trail runners. For rougher terrain, uneven rock, or heavier loads, a boot with more structure can feel steadier.
What matters most at the start is not brand prestige. It’s fit, grip, and comfort over time.
Look for:
- Secure heel hold so your foot doesn’t slide
- Toe room so downhill walking doesn’t jam your toes
- Reliable tread for dirt, gravel, and wet ground
- Enough support for the trail, not more than you need
A clunky boot that rubs your ankle is not “better” than a lighter shoe that fits properly.
Layers are your personal thermostat
New hikers often dress for the parking lot, not the trail.
That’s why layering matters. Think of it as your body’s thermostat. As you warm up on a climb, you remove a layer. When wind picks up on a ridge or you stop for lunch, you add one back.
A simple beginner clothing system usually looks like this:
| Gear piece | Why it matters |
|---|---|
| Moisture-managing base layer | Helps you stay more comfortable when you sweat |
| Midlayer like fleece | Adds warmth when temps drop |
| Wind or rain shell | Blocks weather and helps prevent a chill |
| Extra socks | Useful if your feet get wet or hot spots start |
Cotton can feel nice at home, but on trail it tends to hold moisture. For hiking, fabrics that dry more easily are usually the safer call.
If you feel slightly cool when you start walking, you’re often dressed about right. If you feel cozy at the trailhead, you may overheat ten minutes in.
Navigation is not just for remote wilderness
Beginners hear “navigation” and picture old-school map skills on a mountain pass. In practice, navigation starts much earlier.
It means knowing where you are, where you’re going, and how you’ll recognize the turn back to the trailhead.
For a first hike, that can be as simple as:
- Checking the route before leaving home
- Saving the trail map on your phone
- Carrying a paper backup when possible
- Not assuming signage will solve everything
Even on popular trails, intersections can be confusing when you’re tired, distracted, or chasing daylight.
Hydration is easy to underestimate
A lot of first-time hikers bring “some water” without really thinking through the conditions.
Heat, elevation gain, sun exposure, and pace all change how much you’ll want. The right amount depends on the hike, but the key beginner habit is this. Bring enough that you don’t need to ration, and bring it in a form you’ll drink regularly.
Some hikers sip more consistently from a reservoir hose. Others prefer bottles because they can track what they’ve consumed more clearly. Neither is morally superior. Pick the one you’ll use.
A bottle buried under three layers does you no good.
Why these four matter
The Core Four work because they handle the most immediate problems beginners face.
- Bad footwear leads to blisters, slips, and sore feet
- Poor layering turns a pleasant outing into a cold, sweaty mess
- Weak navigation habits cause wrong turns
- Too little water drains energy and good judgment
Once those basics are solid, adding the rest of your safety kit feels logical instead of overwhelming.
Decoding Your Backpack and The Ten Essentials
A well-packed daypack should feel less like a junk bag and more like a small emergency system. Every item has a job. Some are for comfort. Some are for small problems. A few are there because a minor inconvenience can turn into a serious issue faster than beginners expect.
Here’s the useful mental shift. Don’t ask, “What do people pack?” Ask, “What problem does this solve if the day goes sideways?”
Navigation and sun protection
These two are easy to overlook because they don’t feel dramatic.
Navigation includes your map, compass, and GPS-enabled device. Even if you mainly use your phone, think of it as one part of a system, not the whole system. Phones run out of charge, get wet, or become awkward to use in cold fingers and bad weather.
Sun protection matters even when the day doesn’t feel hot. Skin and eyes still take a beating on open trails, snow, or reflective rock.
Pack these where you can reach them quickly:
- Map or downloaded route
- Compass
- Sunscreen
- Sunglasses
- Hat
A lot of beginners make gear too inaccessible. If sunscreen is buried deep in your pack, you’ll skip it.
Insulation and illumination
Extra clothing is your insurance policy against stillness. You might be warm while moving, then suddenly cold when the pace slows, weather changes, or someone in your group needs a long break.
Carry one more warm layer than your optimistic self thinks you’ll need.
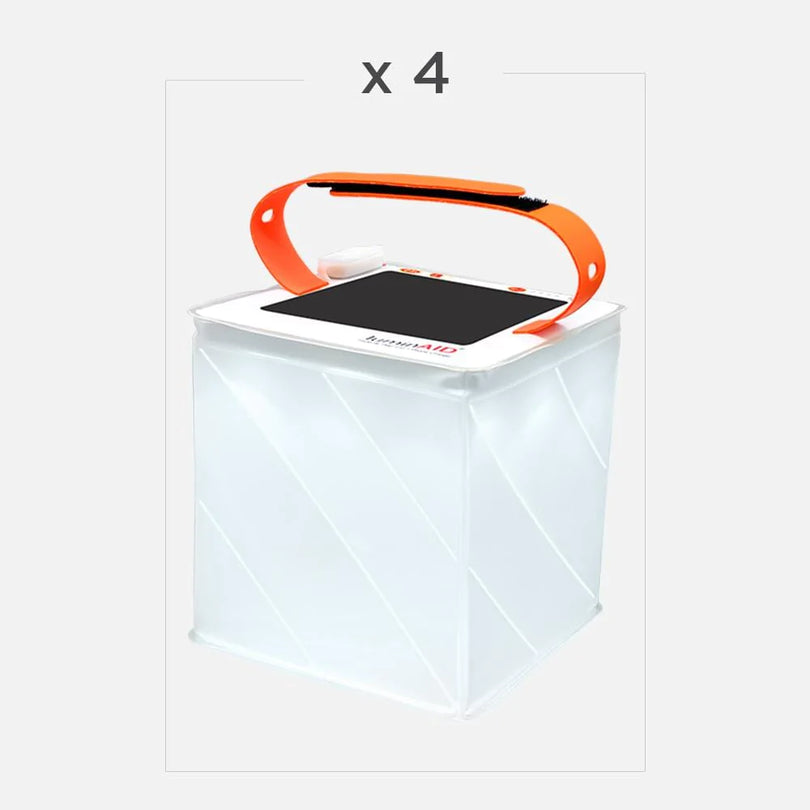
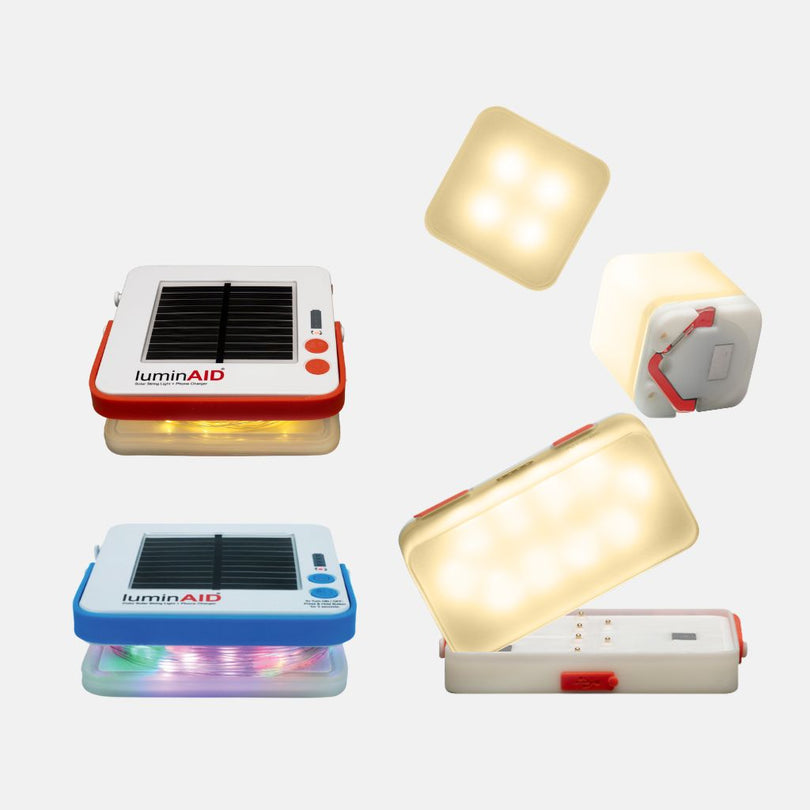
Illumination deserves more thought than it usually gets. Traditional lists tell hikers to carry a headlamp with spare batteries. That’s still a sound baseline. But beginner guides often stop there and skip the practical questions people have.
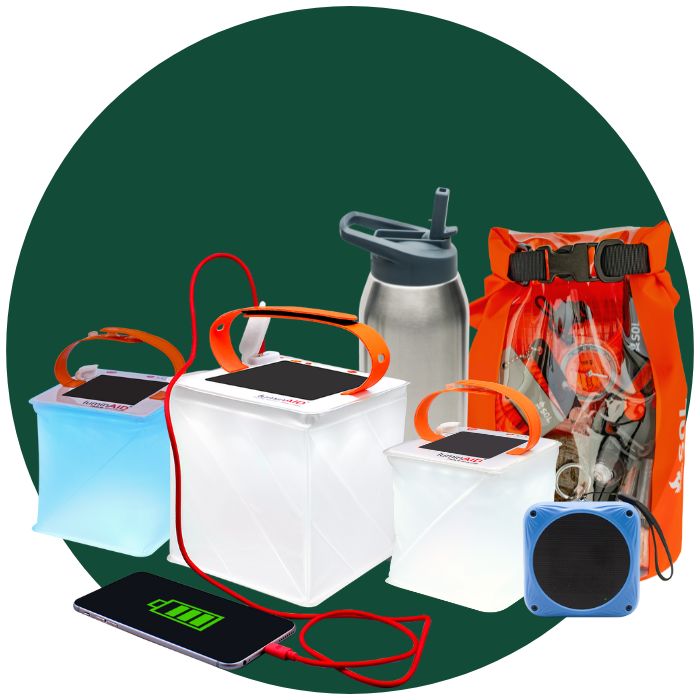
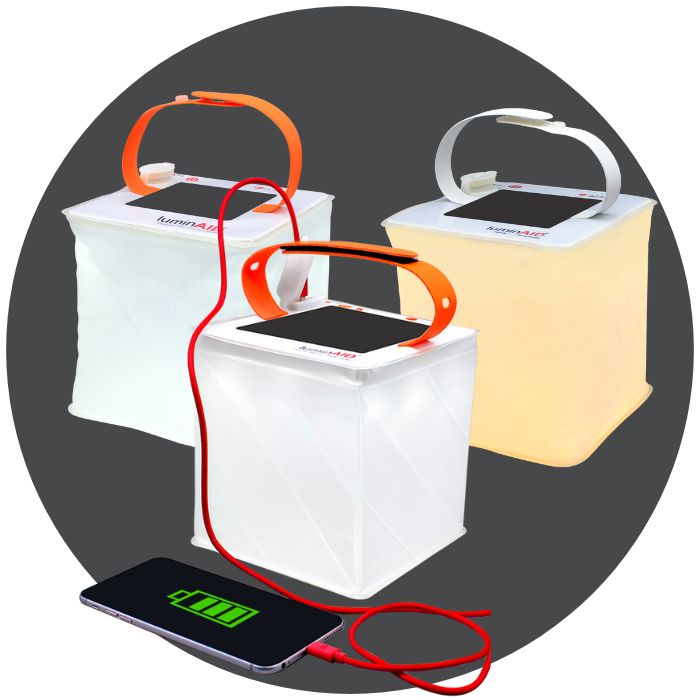
According to the background data provided for this piece, existing content often misses concerns like battery failure, disposable battery waste, and off-grid charging needs. It also notes that Google Trends showed “solar hiking light” searches up 45% over the last 12 months and a 2026 REI survey found 62% of new hikers prioritize off-grid power for devices, as cited by Black Hiking Queen’s hiking starter guide.
That shift makes sense. Many beginners want one item that handles light and backup power without adding another handful of batteries to the bag.
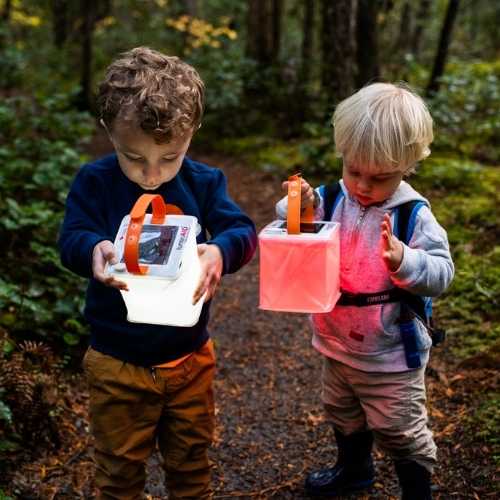
One example is the LuminAID solar lanterns for camping, including inflatable lanterns that provide light and can serve as off-grid phone-charging tools in some models. For a beginner, the key advantage isn’t novelty. It’s simplicity. One compact tool can reduce the number of loose items you need to manage.
Pack for the moment you’re delayed, not the moment you plan to finish.
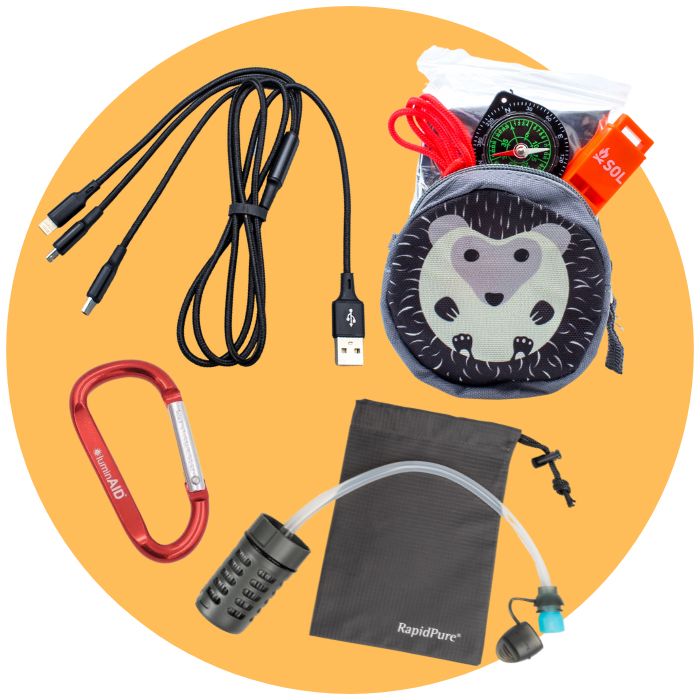
First aid, repair, and fire
These items often live in the “hope I never use this” zone. That’s fine. They still belong in the bag.
A compact first-aid kit should cover blisters, small cuts, and basic trail issues. Pre-built kits are useful because they keep beginners from forgetting the little things. If you want a reliable place to compare options, Adventure Medical Kits is worth a look.
Repair gear sounds excessive until something small breaks. A torn strap, loose sole, broken buckle, or damaged trekking pole can change your day quickly. Duct tape, a knife, or a compact multi-tool can solve a surprising number of small problems.
Fire-starting tools are similar. On a normal day hike, you may never need them. But they’re part of a broader emergency mindset. If you’re unexpectedly delayed, warmth and signaling can matter.
Nutrition, hydration, and emergency shelter
The “extra” in extra food and extra water is the whole point.
Pack more snacks than your plan requires. Hiking often stirs up appetite, and delays happen. Good beginner trail foods are simple, stable, and easy to eat when you’re tired. Think bars, nuts, dried fruit, crackers, or sandwiches that won’t fall apart in your pack.
Water is not only what you drink from the trailhead. It also includes how you’ll handle a longer-than-expected outing. On some hikes, that means carrying more from the start. On others, it means bringing a purification option.
Emergency shelter sounds dramatic, but the item itself often isn’t. A space blanket or emergency bivy can be small enough to disappear into a pocket. That tiny package is there to buy warmth and time if something goes wrong.
A simple way to think about the whole bag
Instead of memorizing all ten categories, sort them into three buckets:
| Bucket | What belongs there | Why it matters |
|---|---|---|
| Find your way | Navigation, illumination | Helps you avoid getting lost and handle low light |
| Protect your body | Sun protection, insulation, hydration, nutrition, shelter | Covers exposure, temperature, and energy |
| Handle problems | First aid, fire, repair tools | Helps with injuries, delays, and broken gear |
That frame helps beginners make better choices. If a piece of gear fits one of those jobs, it probably earns its place. If it doesn’t, it might be dead weight.
How to Choose Your First Pair of Hiking Boots
If you buy one item that can make or break your day, it’s your footwear.
A beginner can get away with a basic pack for a while. You can borrow layers. You can improvise snacks. But bad shoes announce themselves with every step.

Shoe, mid boot, or high boot
Start with the trail, not the label.
A low hiking shoe or trail runner often works well for smoother trails and lighter loads. A mid-cut boot adds more structure around the ankle and can feel steadier on rocky or uneven terrain. A taller boot offers even more coverage, but it also adds weight and can feel stiffer.
That trade-off matters. More support can feel reassuring. More weight can feel tiring. Beginners often assume heavier means safer, but that’s not always true.
Here’s the simplest comparison:
- Hiking shoes or trail runners work well if you want lighter, more flexible movement.
- Mid-cut boots suit many new hikers because they balance support and agility.
- High-cut boots make more sense when the terrain is rougher or the pack is heavier.
If you’re curious about the lighter end of the spectrum, this article on understanding trail running shoes gives useful context for how trail-focused footwear differs from traditional hiking boots.
Waterproof or breathable
This choice confuses almost everyone at first.
Waterproof footwear can help in wet grass, shallow puddles, muddy conditions, and cool weather. But waterproof designs can also feel warmer and may dry more slowly once water gets in from above.
Breathable shoes usually feel cooler and dry faster. They’re a good fit for hot climates, dry trails, and hikers who prioritize airflow.
Neither option is universally right. Ask yourself:
- Will I hike mostly in dry or wet conditions
- Do my feet run hot
- Am I walking through puddles and damp brush often
- Would I rather block water or dry quickly
That question alone narrows the field fast.
Traction and sole feel
Beginners often press on the upper part of a boot and forget to look underneath.
The outsole matters because that’s what meets the trail. Deep, well-shaped lugs usually grip loose dirt and mud better than flatter soles. A sole that feels too soft may be comfortable in the store but less stable on rock. One that feels too rigid may feel secure but awkward on easy terrain.
Try to bend the shoe gently. Look at the tread. Picture the trail you’ll walk most often.
After you’ve looked at the basics, it helps to see how fit checks work in practice:
How to try boots on the smart way
The fitting process matters almost as much as the boot itself.
Use this in-store routine:
- Shop later in the day because feet often swell after you’ve been on them.
- Wear hiking socks or the socks you expect to use on trail.
- Walk uphill and downhill on the test ramp if the store has one.
- Check toe space on descents so your toes don’t slam forward.
- Notice heel lift because rubbing there can become a blister fast.
A boot that feels “fine” in the store can feel terrible three miles later. Don’t settle for fine.
One more rule. Don’t buy new boots and immediately take them on a long hike. Wear them on neighborhood walks first. Then use them on a shorter trail. Let your feet vote before you commit.
From Day Hikes to Your First Overnight Trip
The jump from day hiking to sleeping outside feels big, but the gear logic stays the same. You’re still solving the same problems. You just need your equipment to keep working after the sun goes down.
Most overnight setups revolve around three big choices. Shelter, sleep system, and backpack. If those three work well together, the rest of the trip becomes much more manageable.

Shelter means weather protection and sleep quality
A shelter isn’t only about rain. It’s about wind, bugs, condensation, privacy, and how much mental energy setup takes at the end of a long day.
Beginners usually consider three main options:
| Shelter type | Good fit for | Trade-off to know |
|---|---|---|
| Backpacking tent | Most beginners | More parts, but familiar and protective |
| Bivy sack | Minimalist setups | Compact, but tighter and less comfortable |
| Hammock system | Forested areas with suitable trees | Comfortable for some people, but setup and insulation can be trickier |
A tent is often the easiest starting point because it gives beginners a clearer sense of personal space and weather protection. You get room for gear, a simpler routine, and fewer surprises the first night out.
Your sleep system is really three parts
New backpackers often think “sleep system” means sleeping bag. It means bag or quilt, sleeping pad, and the clothes you sleep in.
The bag handles insulation around you. The pad handles insulation under you and adds cushioning. Your sleep clothing helps keep the system dry and comfortable.
A few beginner-friendly distinctions matter:
- Down insulation usually packs smaller and feels lighter for the warmth, but it needs more care around moisture.
- Synthetic insulation is often bulkier, but many beginners appreciate its simpler handling in damp conditions.
- Sleeping pad warmth matters because cold ground can drain heat fast.
If sleeping bag ratings confuse you, you’re not alone. Treat them as a starting point, not a guarantee of comfort. If you tend to sleep cold, build in a little margin rather than choosing the absolute minimum.
Backpack size changes when the trip does
A daypack carries trail essentials. An overnight backpack also has to carry your shelter and sleep system, plus food and camp items.
That changes the fit question. With overnight packs, comfort depends less on whether the pack looks sleek and more on whether it transfers weight to your hips well.
When trying one on, pay attention to:
- Torso length fit because pack size should match your body, not just your height
- Hip belt position so weight sits on your hips instead of hanging from your shoulders
- Shoulder strap shape because pressure points get old quickly
- Access points and pockets so you’re not unpacking everything to reach one item
A common beginner mistake is buying the biggest pack first, then filling it because there’s room. A better path is the reverse. Choose your gear, then choose the smallest pack that carries it comfortably.
Bigger packs don’t automatically create safer trips. They often create heavier ones.
Build your overnight kit in order
If you’re moving from day hikes toward backpacking, buy in this order:
- Sleep system first because poor sleep ruins the whole experience.
- Shelter second because weather protection is essential.
- Pack third because the size should match the gear you own.
That order helps you avoid buying a pack that’s too small for your shelter or absurdly large for a compact setup.
Your first overnight trip doesn’t need to be epic. A short hike to camp, fair weather, and a forgiving site close to your car or trailhead can teach you more than a huge mileage goal ever will.
Your Practical Packing Checklists
This is the part to copy into your notes app.
A checklist reduces decision fatigue. It also helps you spot what changes when you move from a day hike to an overnight trip.
Day hike checklist
Use this for local trails, easy summit days, and shorter outings where you’ll return the same day.
- Footwear and socks sturdy hiking shoes or boots, plus socks that manage moisture well
- Clothing layers base layer, insulating layer, rain or wind shell, hat
- Navigation phone with saved route, map, compass
- Sun protection sunglasses, sunscreen
- Hydration water bottles or reservoir, plus a water treatment option if your route calls for it
- Food lunch, snacks, and extra snacks
- Illumination headlamp or compact light source
- First aid blister care, bandages, basic supplies
- Repair and tools small knife or multi-tool, a bit of duct tape
- Emergency shelter space blanket or emergency bivy
- Fire starter lighter or waterproof matches
- Personal items ID, permits if needed, phone, keys
- Bug protection insect repellent from a trail-friendly option such as Natrapel
- Wildlife protection where appropriate bear spray from a specialist like Counter Assault, if local guidance recommends it
Overnight backpacking checklist
This list includes everything above, plus the gear that keeps you comfortable in camp and overnight.
- Shelter tent, bivy, or hammock system with stakes and guylines
- Sleep system sleeping bag or quilt, sleeping pad, sleep clothes
- Backpacking pack properly fitted for overnight loads
- Camp kitchen stove, fuel, pot, spoon, mug if desired
- Food storage method appropriate for the area
- Meals dinner, breakfast, trail snacks, emergency food
- Water setup bottles or reservoir, plus your chosen purification method
- Camp lighting light for cooking, organizing gear, and low-light tasks
- Hygiene items toilet paper, trowel where needed, hand sanitizer
- Extra clothing dry socks, warm layer, rain gear
- Camp extras small sit pad, repair kit, trash bag
How to pack so the bag carries well
Packing order changes how a backpack feels on your body.
Use this simple pattern:
| Pack zone | Put these items there |
|---|---|
| Bottom | Bulky lighter items like spare layers or sleep gear |
| Center close to your back | Heavier items such as water, food, and denser gear |
| Top | Frequently needed items like rain layer, first aid, snacks |
| Outer pockets | Water, map, sunscreen, bug spray, quick-access items |
If you want more ideas on making gear easier to reach, these packing hacks are useful for organizing small essentials without creating clutter.
One final packing rule is worth keeping. If an item is for emergencies, it should still be easy to find. “Technically packed” and “usable under stress” are not the same thing.
Common Beginner Mistakes and How to Avoid Them
Most beginner mistakes come from good intentions. You want to be comfortable, prepared, and not forget anything. The problem is that those instincts can pull in opposite directions.
The mistakes I see most often
- Wearing cotton for active conditions because it feels familiar, then staying damp and chilly once the pace or weather changes
- Taking brand-new boots on a big hike before your feet and the footwear have learned each other
- Packing too many just-in-case items until the bag becomes heavier than the trail requires
- Underestimating water because the mileage looks short on paper
- Ignoring the forecast and assuming a pleasant morning means a pleasant day
None of these mean you’re bad at hiking. They mean you’re new.
The trail is a patient teacher, but it charges for some lessons in blisters, cold fingers, and tired legs.
Easy fixes that make a big difference
Use a quick pre-hike check:
- Lay out your clothes and remove cotton-heavy choices for active layers
- Test boots before the trip
- Ask what each packed item is for
- Check weather and daylight
- Refill and confirm water before leaving
Gear care matters too. Clean dirt off boots so materials don’t break down faster. Store sleeping bags loosely instead of crushed down for long periods. Check lights, zippers, and straps before the next trip, not at the trailhead.
That’s one of the quiet secrets of hiking gear for beginners. Confidence doesn’t come from owning more stuff. It comes from knowing your gear works when you reach for it.
You Are Ready for the Trail
You don’t need a perfect kit to begin. You need a safe one, a comfortable one, and one that matches the hike in front of you.
Start small. Prioritize the Ten Essentials. Learn what your feet like, what layers you use, and what kind of hikes make you want to go back out next weekend.
The best hiking gear for beginners isn’t the most expensive setup. It’s the gear that helps you step onto the trail calm, prepared, and curious. Pick an easy route, pack with intention, and go get your first good trail story.
If you want a simple lighting upgrade for hiking, camping, or emergency kits, take a look at LuminAID. Their portable solar lanterns and 2-in-1 phone-charging lights fit naturally into a beginner-friendly approach to off-grid preparedness.